Showing posts with label drugstore. Show all posts

Friday, October 4, 2013

L'Oreal Lash Out Butterfly Mascara Review

Hey everybody! Today we're going to be talking about a new drugstore product that I haven't heard much about yet. It seems like it sneaked its way on to the shelves unnoticed. I've only just begun to see some reviews, and they were generally positive, so I had to get my hands on it. Here's what I have to say...


The whole thing about this mascara is it's supposed to give fluttery lashes. It has a little wing on the wand that it supposed to help reach and extend the outer lashes. It has a plastic wand, which is actually something I prefer.
I will say, I like the packaging. It's very sleek and understated, which I appreciate.

Here are my lashes without mascara:


Here they are after one coat:


And here they are after two:


Overall, I like this mascara. I think "Butterfly" is a good name for it, because it really does give fluttery looking lashes. If you're looking for length and definition, this is a great choice. Also, I think this would be a great layering mascara. If you are willing to take the time and use a separate mascara over top of this one that is really volumizing, the combination is going to give you amazing lashes.

I like the wand. The little wing is actually easy to use and effective. It's not a very messy mascara like others can be. It doesn't get all over your lids or under-eyes. As far as smudging or flaking, this is the best performing L'Oreal mascara I've ever had. It smudges and flakes a little bit, but only if it's been a really long day. Generally L'Oreal mascaras flake and smudge horribly on me.


This gets two thumbs up from me. Not sure if it replaces my Maybelline The Rocket, but I would certainly repurchase it and throw it in the mix.

Much love,
Gianna

Tuesday, September 24, 2013

Light, Natural Makeup Products

Hey everybody! Even though I am a makeup addict, I understand that a full face of makeup every day is just not feasible for most people. When I wake up early in the morning for school, the last thing I feel like doing is putting on some thick foundation, lipstick, liner, etc. Not only is a full face of makeup a hassle at times, it's also not very good for your skin.

I've put together four products that are extremely natural, light, and easy to put on and go. On days where I just don't care enough to do anything extra, these are the products I use.

Left to right: Covergirl Super Thick Lash Mascara, Revlon Lip Butter in Berry Smoothie, Jouer Matte Moisture Tint, NYX Blush in Mocha

Covergirl Super Thick Lash is pretty awesome for natural, but still nice looking lashes. When I don't feel like piling on Maybelline The Rocket (which gives tons of volume and length), I go with this. It lengthens, defines, and thickens my lashes, but still looks natural. It's a mascara that perfects your lashes without looking like you have mascara on. I really enjoy it, and it's super cheap at your local drugstore.

Revlon Lip Butters are really light and glossy. The shade Berry Smoothie is a natural pink color, very much like the natural color of my lips. It doesn't add tons of color, just a little tint and a glossy finish. It makes my lips look healthy and beautiful. I love it!

Jouer Matte Moisture Tint
is just awesome. It's light to medium coverage, but way better than a tinted moisturizer. It perfects my skin, looks really natural, and covers just about everything I expect it to cover. I have a full review on it, if you would like to see what I think of it in depth.

Last but not least, NYX Blush in Mocha. This blush leans pink, but not too pink. It's completely matte, which is going to give you the most natural look. Blush is not really something that I think we should skip, even if we're doing a natural look. A slight flush to the cheeks makes us look healthy. Choose whatever shade you like best, but I think Mocha is a fabulous choice.

Here are a few swatches...


NYX Mocha, Revlon Berry Smoothie

They are quite similar colors. I totally did not plan it that way! Depending on your skin tone, choose the best color that suits you. I am quite fair with yellow undertones. I think neutral pinks suit me really well if I'm trying to look put together, but not overdone.


That's all for now!

Much love,
Gianna

Saturday, September 14, 2013

Favorite Drugstore Under Eye Concealer

Hey everybody! Under eye concealer is one of those things that I seem to change my mind on a lot. But by trying different products with different consistencies, I think I have found what I like in an under eye concealer. My under eye area can be quite dry, even though my skin is rather oily. Most under eye concealers accentuate the dryness around my eyes, which is a terrible look. I look for under eye concealers that are really creamy; if it is too thin, it accentuates my dryness. Products like the Maybelline Instant Age Rewind under eye concealer is very thin, and looks very dry on me. MAC Pro Longwear has a similar aging effect. Although I like Pro Longwear, I don't like the way it looks on me after a whole day's worth of wear.

The Maybelline Dream Lumi Touch Concealer is quickly becoming my go-to under eye product. It is supposed to have a "gel" formula, which makes a lot of sense. It kind of glides over my under eye area, rather than settles into the lines.


For right around six bucks, I think this stuff performs right up there with higher end products. It reminds me a lot of Tarte's Creaseless Concealer, which I really enjoy.

I have it in two shades, Radiant and Ivory. Radiant is a light pink color meant for highlighting and brightening purposes. Ivory is slightly lighter than my natural skin tone. I have been using Ivory a bunch lately, and I find that it does a fantastic job of brightening up the area under my eyes as well as concealing my circles.

As far as the way it wears throughout the day, I really enjoy how it holds up. I don't really find that it creases on me. It may sink into some fine lines a little bit, but unlike other concealers, I don't find that this makes me look old and dry under there.


Overall I just really enjoy this product. It covers well and performs at a great standard, especially for such a low price. If you tried the Age Rewind concealer and didn't like it, or if you're looking for something at a drugstore price that its moisturizing like Tarte's under eye concealer, I say give this a go.


That's all for now!

Much love,

Gianna

Tuesday, September 10, 2013

Cheap Brush/Beauty Blender Cleanser!

Hey everybody! Oftentimes we get lazy with keeping our cosmetics clean, but the truth is we really need to be aware of sanitizing our cosmetic tools. Brushes get covered in product, touch our face repeatedly, get dipped in product again, etc. It's a playground for bacteria to grow, and I know I certainly don't want that anywhere near my face. I already have enough skin issues to deal with.

I find that the best way for me to keep my brushes clean is to spot clean after each use, and deep clean every four weeks or so. I could probably do a deep cleaning more often, but let's be realistic. I have quite a few brushes, and it takes a while to clean them all. Every four weeks is pretty typical for me, and I'm okay with that.

Today I want to talk about deep cleaning my brushes, and a fantastic product that I have found to get the job done quickly and effectively. I used to use the Beauty Blender Liquid Cleanser, which is just okay. I found that I had to use a lot of product for it to get my brushes clean, especially the really dense ones like my Sigma F80. It never really got the stains out of my Beauty Blender, which is just ridiculous. I also don't like that it's in a liquid form, because I find it inconvenient. Then they recently came out with the Beauty Blender Solid cleanser, which I have considered purchasing but could never bring myself to spend so much money on a stupid bar of soap, even though I've heard it's great.

So I started hearing others talk about their own methods, like baby shampoo, Dawn dish soap, etc, but nothing really struck my fancy. Today I was browsing the aisle's on my local Walgreens and saw Dr. Bronner's All-One Hemp Lavender Soap in bar form. I had heard a beauty guru talking about it, and I was like, that might be worth a shot.


I brought it home and tried it out, and let me tell you what, this is good stuff. I LOVE that it's in a bar form, it makes it so easy. I just run the bar under water and take my brushes to it. Swirl it around on the soap, swirl it around on the palm of my hand, rinse, and viola. It cleans my brushes so amazingly quick. My beauty blender was clean in a matter of seconds. This is really important to me, because sponges hold bacteria like crazy. It smells absolutely divine, I just want to bathe myself in the smell. They have many other scents as well, so if lavender isn't your thing, you have options. The only thing is, lots of oils are used in the soap. It's very moisturizing, but next time I might go with the peppermint one, just so it's a little bit more clarifying. However, if your brushes are really scratchy, Dr. Bronner's might be a great option.


The best thing about Dr. Bronner's is the ingredients. It's completely natural, organic, doesn't test on animals, and mutli-functional. Dr. Bronner's is known for the liquid soap, which can be used for absolutely anything- washing your clothes, your body, your hair, even brushing your teeth. I feel totally comfortable using this soap to clean my brushes. In fact, I feel better about this than any other cleanser, which likely has lots of chemicals and harsh ingredients that I don't want to put on my skin.


I highly suggest checking out the bar or liquid soap- whichever you prefer. It's cheap, effective, and totally natural. Can there be anything better?

What do you clean your brushes with?


Much love,
Gianna

Saturday, September 7, 2013

Hard Candy Mod Quad Baked Eyeshadow Swatches/First Impression

Hey everybody! I stopped at my local Walmart today and spotted some Hard Candy Mod Quad Baked Eye Shadows. I'm not sure if they are limited edition, but they were situated right in with the rest of the Hard Candy line, so I am guessing not. I believe they are new, because I have not seen these before. I can't think of anything that I own by Hard Candy, although I have heard great things about their baked shadow duos and have wanted to get my hands on them for a bit. I've never gotten around to actually picking up any duos, but I saw these quads and I was like MINE.

Hard Candy is sold exclusively at WalMart. I bought mine for six dollars each. You can also order them online at the link provided above.

I bought four quads out of the five available: Brownie Points, Pink Interlude, Under the Moon, and Ivy League. The last one that I did not buy is called Smoke Mirrors, which has a lot of grey/silver shades.

Brownie Points, Pink Interlude

Under the Moon, Ivy League

I will say that I don't love the packaging. It's kind of bulky. On the inside there is an okay mirror, which is pretty cool. But other than that I find them to just be a little excessive in the packaging department. However, they're durable and good for travel.

Here are the swatches. The top row of each picture are the colors swatched dry, the bottom row are the colors swatched wet.

Brownie Points

Pink Interlude

Under the Moon


Ivy League


I haven't worn any of these on my eyes yet, but all I have to say is...wow. I'm really excited to put these babies to use. Dry, they are just okay, but wet, they seem great. The pigmentation is totally on point, they are metallic, the glitter shows up, it's just all around impressive.

I might just have to go pick up the last quad. I avoided it because I don't often wear greys and silvers on my eyes, but I might make an exception. For the price, I think these are really worth checking into.


What do you think? Do you have your eye on any of these? Let me know!


Much love,
Gianna

Friday, September 6, 2013

Impress Nails Review

Hey everybody! I am by no means a pro at nail painting. When it comes to beauty related things, makeup is my main squeeze; hair and nails fall by the wayside. I am always looking for polishes that are supposedly "long wearing" or chip-resistant, because I don't like to repaint my nails very often. Once a week is more than enough for me. However, more than once a week is usually necessary (although I rarely do, anyways) because I work part time at a local fast food place. My hands are always being dipped in sanitizer water, cleaning things, wearing gloves, washing dishes, etc. Also, my nails are quite thin and brittle, so acrylic nails are not an option for me. I find that my nails cannot handle the grinding down, acetone removal, or any of that stuff. Even gel manicures are kind of harsh on my thin nails. So, with all of these nail-related-woes, I am pretty much looking for a solution that is durable, nice looking, and kind to my fragile nails. Impress Nails have pretty much provided me with what I am looking for.


Impress Nails are basically plastic nails that have the glue already applied to them. You peel off the plastic layer to reveal the bottom of the nail with glue on it. You apply it to your nail, and it is supposed to stay on for up to a week. You can find them at pretty much any drugstore for around $6-8 dollars. They come in a whole array of colors and designs, and I believe there are both short and medium length options. Each pack of nails comes with many different sizes and multiple size options for each nail. You'll get two applications out of one pack. However, you may not have the perfect fit for each nail on the second application if you use up all of your correct sizes on the first application.

These are my nails with the tie-dye Impress Nails applied.


I have to tell you guys, I really like these. I wore just a plain french-manicure style set to Las Vegas for my 21st and I had absolutely no issues. I even brought extras just in case one were to pop off during my trip. I'm happy to report that they stayed fantastically, and I probably could have gotten another couple of days of wear when I was home and ready to remove them. I think that the staying power all has to do with your application, and how hard you are on your nails. Once you apply them, don't run your hands under water for at least an hour. I think this gives the nails time to totally set. Also, I wasn't working when I was in Vegas, so my normal, day-to-day activity was perfectly fine on the nails. They looked great, stayed put, and I was really happy with them overall.

The nails don't look like your natural nails. However, I don't think that's supposed to be the point of these. They are supposed to look like you did your nails all fancy. They don't look ridiculous or like plastic (in my opinion), they just look like you had your nails done by someone else.

I have a few small complaints that I want to get out of the way. With the french-manicure style nails, you can see the glue on your nail if you look really closely. I highly doubt it's noticeable to anybody else, but it's noticeable to me. You eliminate this problem when you use the sets that are totally opaque, like the ones that have a design or are a solid color.
My second problem with these is the price. It makes it better that you get two applications from one set; however, they are still pricey if it's something you're going to be wearing often. I don't wear these every day. But for special occasions or just once in a while, these are great.


Overall, I highly recommend these. They stay put for up to (and sometimes over) a week, they don't damage my natural nails, they look nice, are relatively inexpensive for special occasions, and are so darn easy to apply. I approve!


What do you guys think? Have you tried any fake nails?

Much love,
Gianna

Wednesday, September 4, 2013

Everyday Lipsticks From the Drugstore

Hey everybody! When it comes to lipstick, I generally turn to the drugstore. The only time I get a high end lipstick is if I am back-to-MAC'ing some stuff and get one for free. I think there are some great formulas at the drugstore that are definitely comparable to high end ones. Why spend the money when the drugstore has so much to offer?

Today I want to talk about "everyday" lipsticks. When I say "everyday," I mean those colors that just go with everything. They offer a your-lips-but-better kind of finish, and they are totally work and school appropriate. Nude lipsticks are probably my favorite, and I don't often venture into anything too flashy or bright. If you're looking for some ideas on great nude lipsticks from the drugstore, take a look at what I have collected...

Left to Right: Revlon Super Lustrous Lipsick in Blushing Mauve, Sassy Mauve, Wink for Pink, and Primrose. Rimmel Lasting Finish in Airy Fairy. Milani Color Statement in Nude Creme. NYX Round Lipstick in Tea Rose. L'Oreal Color Riche in Fairest Nude.


And of course, swatches.

Left to Right: Revlon Super Lustrous Lipsick in Blushing Mauve, Sassy Mauve, Wink for Pink, and Primrose. Rimmel Lasting Finish in Airy Fairy. Milani Color Statement in Nude Creme. NYX Round Lipstick in Tea Rose. L'Oreal Color Riche in Fairest Nude.


As you can see, I have a lot of the Revlon Super Lustrous Lipsticks in this selection. This is my favorite lipstick line at the drugstore. Blushing Mauve and Sassy Mauve are very similar. Sassy Mauve is bit darker, but still wearable. It might be a great everyday shade for someone with darker skin. With Fall coming up, these are great choices. Wink for Pink and Primrose are great choices if you want something with pink in it. Wink for Pink is a bit more pink-coral. Primrose is a cool pink.

Rimmel Airy Fairy is probably my favorite of the bunch. It's just so perfect, not too pink, not too brown. I love it.

Milani Color Statement in Nude Creme is another fantastic choice. This is a very creamy, pigmented lipstick. The smell is kind of distinct... if you don't like lipsticks that smell, this might not be for you. Other than that, it's a great color.

NYX Round Lipstick in Tea Rose is fantastic. It's very pigmented, and a nice pinky-nude color. I have seen NYX at Target (Yes, TARGET!) lately. Hallelujah.

Last but not least, L'Oreal Color Riche in Fairest Nude. This was my long time favorite until Rimmel Airy Fairy entered my life. It leans pretty brown, but it's still a great shade. I'm quite fair with olive undertones, and I find it works well for me.


What about you guys? Do you have another great nude lipstick that you love? Let me know!


Much love,

Gianna

Saturday, August 31, 2013

Best of the Brand: Revlon

Hey everybody! Today I want to talk about what is probably my favorite brand from the drugstore- REVLON! Revlon has some absolutely great stuff on the market. Let's take a look at what products I think are the best.


When it comes to face products from the drugstore, Revlon can't be beat. Revlon Colorstay Whipped has no-joke coverage and lasting power, and easily holds up on my oily skin. When I want some major coverage on those bad skin days, this is what I'm reaching for. Nearly Naked Foundation is another great option if you want something lighter with less coverage. It perfects the skin in a pretty way, and is never over the top or cakey. I enjoy it.

Revlon has it in the bag when it comes to lip products as well. I adore the Super Lustrous Lipsticks- I have at least ten shades in my collection. If you're new to lipstick and you're wondering where to start at the drugstore, this line is a really good one. I like the formula a lot, and the color range is great. These are just simple, classic lipsticks that are never going to go out of style. One of my favorite shades is Primrose. The lip glosses (which have been recently repackaged, so they look different than what is pictured) are another favorite amongst beauty bloggers. Also, I recently picked up my very first lip butter (gasp) the other day, and I can see how everybody loves this stuff. I know I'm a few years late to the party, but I get the hype. They are hydrating, easy to wear, and have a surprising amount of pigmentation for something labeled a lip "butter." Last but not least of the lip products, the Kissable Balm Stains are really good. They have a glossy finish, but they most certainly stain your lips.

Also, I have to mention the lash adhesive, which is actually the only one I own. I chose this one because of the applicator. It's super user-friendly. I'm not a pro with lashes, so I appreciate a product like this that is easy to use and works well.


That's all for now!

What are your favorite Revlon products?


Much love,
Gianna


Thursday, August 29, 2013

Jordana 12 Hour Made to Last Eyeshadow Pencils

Hey everybody! Today I've got a review on an awesome product from one of the most inexpensive brands at the drugstore. Jordana has recently (or maybe not so recently...) come out with some eyeshadow pencils that are rocking my makeup world. I haven't seen these on the shelves before now, but maybe I'm just late to the party- it wouldn't be the first time that has happened.

Sorry the pencils are so dirty! They are very creamy, and can get everywhere easily!


Stay-On Black, Eternal White, Pink Evermore, Endless Emerald, Continous Almond

Stay-On Black, Eternal White, Pink Evermore, Endless Emerald, Continous Almond

The pencils are called "12 Hour Made to Last Eyeshadow Pencils" which is pretty fitting for how they perform. They are ultra creamy when you first apply them, and easily blended out. But once they set, they set to a totally budge-proof state. I tried these out without a primer (topped with eyeshadow) and didn't expect much. I have oily lids, and without my beloved Urban Decay Primer Potion, my eyeshadow is a wreck. However, these sticks totally held up throughout my day and were crease-free when I went to take my makeup off at night. They lasted all through my work day, the heat, the sweat, and general day-to-day wear that my eyeshadow goes through. I was amazed. For $3.99, it can't be beat.


I did not try these shadow sticks on their own without eyeshadow on top, so I am not sure what would happen if they were not set with powder. However, to me these are meant to be eyeshadow bases that enhance (or slightly alter, depending on the base color you choose) the color of your shadow. They work fantastically as bases.

As far as color selection goes, I think Jordana nailed it on the head. The only thing I wish they had was MORE! More colors, please! But for what is offered right now, the selection is really great. They have four basic, all matte shades that are amazing. There's a dark black that would be great for smokey eyes, a rich brown (I do not own this one), a matte white (NYX pencil in Milk, you better watch out!), and a very neutral color that would work to cancel out discoloration on the lid if you have a similar skin tone.

As far as colorful shades, they've got a teal (I do not own this one), a purple (I do not own this one either), a sparkly pink, and a beautiful emerald shade. The ones I have are quite beautiful.

Overall, I think my favorites are Continuous Almond and Endless Emerald, because these colors are amazing. I can see Continuous Almond becoming an every day product for me. Endless Emerald is simply beautiful, and with Fall coming up, this shade is perfect.


Have you guys tried these? Do you like them? Let me know!

Much, much love!

Gianna

Saturday, August 17, 2013

How To Co-Wash

Hey everybody! It's been nearly seven weeks into the Curly Girl Method, and I've had some ups and downs. Co-washing is pretty much the center of the Curly Girl Method, so I thought I would devote a post to this topic.

Co-Washing is short for Conditioner Washing. Instead of using shampoo, Curly Girls use conditioner that is free of silicones to wash their hair on a daily basis. It is okay to use sulfate-free shampoo, but co-washing is more gentle on our hair. Popular conditioners that are Curly Girl Approved from the drugstore are the Suave Naturals Coconut Conditioner and the V05 Moisture Milk Conditioner in Strawberries and Cream, which both usually retail for under three dollars at most drugstores. It doesn't have to be these specific scents- any Suave Naturals Conditioner or V05 Moisture Milk Conditioner will do.

When you co-wash, it is important to start off with a good amount of product. I have pretty long hair- past mid-back but not quite to my waist yet. I use half a palm-full of conditioner, or about the size of two quarters. I distribute it everywhere on my scalp, at the forehead, the nape of the neck, sides of the face, behind the ears, crown of my head...everywhere. And then I start to scrub. I use my fingers and really work the product in. I notice that if I neglect one section of hair, my hair is oily the next day in that section. So I pay attention to really scrub every part of my scalp. Don't hurt yourself or scratch your scalp or anything, just get down in there and scrub. Remember that there are no sulfates to do the job for you. You have to manually remove the dirt and product from your hair. Even though I've used a significant amount of conditioner already, sometimes I'll come back and add more to the places I feel need it. As a curly girl, you go through a lot of conditioner. Luckily we can use ultra cheap ones that aren't a hassle to repurchase.

After I have scrubbed my scalp thoroughly, I rinse out the co-wash. When I rinse it out, I scrub some more. Work the water into each section and thoroughly rinse out your co-wash. By the end of my shower, my arms are a little tired from scrubbing. But that's what gets my hair clean, so that's what I do. Make sure to use your fingers as you rinse it out. Using your fingers is the key to this whole process.


After I have rinsed everything out, I put in my rinse-out conditioner, which is a separate, heavier conditioner that replenishes moisture. I use the Tresemme Naturals Nourishing Moisture Conditioner. This is a popular drugstore rinse-out. I use this product on about 3/4 the length of my hair. I don't put it on my roots, because I just spent so much time scrubbing my scalp clean.

I let it sit as I finish my shower, rinse it out, and then I'm done.

I am learning that being thorough is really the only way to get my hair feeling clean enough (for my liking) with co-washing.


What about you guys? Any curly girl tips out there?

Much love!

Gianna


Thursday, August 15, 2013

Review: NARS Light Reflecting Pressed Setting Powder

Hey everybody! I recently hauled some stuff from my trip to Vegas, and the NARS Light Reflecting Pressed Setting Powder was one of the things I bought. I think I have mentioned a few times in previous posts that I do not like powder much at all, even though I am oily. I feel that it makes me look cakey and doesn't usually do much for prolonging my makeup or keeping oil at bay. I usually skip powder entirely, to be honest. But I picked this up at Sephora because I had heard good things. I bought it for $34.00, which isn't too bad for a high end powder. It is comparable in price to many other setting powders at Sephora.


It comes in a nice little soft pouch. I guess this is good if you want to keep the packaging clean, or use the product with a sponge. I personally don't use a sponge, but there is one included in the kit. I think I would have preferred a lower price tag and no pouch, but whatever. Because I don't use a sponge, it's pretty useless to me.


As you can see, the product appears white in the pan. When I swatch it, you can see some of the product on my finger, but on my face it is completely transparent. I think this powder would be fine on any skin tone, honestly. When I swatch it, I can see a very slight sheen that the powder gives off. On the face, it is not that obvious. I wouldn't say it's entirely matte, but it's not glowy, glittery, or shiny in any way. It's just nice.

There is one downside to this powder that is annoying. There is a hard layer that covers the top of this powder that you have to break through in order to get any product on your brush. If the layer is not broken, you're not going to be picking up any product. You'll know that you've completely broken the top layer when you start seeing the powder look shiny. I used a really rough brush that I have just sitting around in my stash to break through the top layer. It didn't take much work at all, but I just want you guys to be forewarned. If I didn't have a really scratchy brush, I don't know that I would have been able to reach the product as easily.

Once you get to the actual product, it is velvety smooth to the touch. Seriously, it is so luxurious.

As far as what it does to my skin- I love it. It sets my makeup really well without looking like powder at all. It's amazing. It is also really blurring. When I swipe this stuff over my pores, they become way less noticeable. It just makes everything flawless without changing the color of your foundation. Like I said- it's not too matte, nor too shiny. "Light reflecting" is a good name for it, because it certainly does that.

I don't know that it prolongs the wear of my foundation. It does an alright job of keeping oil under control, but I don't rely on it to keep me shine free all day. I choose foundations that are good for oily skin (or, at least, my oily skin), and top it with this. I have used it over three of my favorite foundations- Revlon Colorstay Whipped, Shiseido Sun Protection Liquid Foundation, and NARS Sheer Glow. It was great over all three.

Overall, I love this powder. It's exactly what I want in a powder, because it doesn't look like a powder on the skin at all.

What do you guys think? Have you tried it, or the loose version? Let me know!


Much love!

Gianna

Monday, August 5, 2013

All Drugstore Back to School Makeup!

Hey everybody! It's getting to be that time of year again where we're all starting to prepare to go back to school. When I was in high school I wore makeup, but I had no idea what I was doing. I'm sure that I caked on the MAC Studio Fix Fluid and powder like there was no tomorrow. I didn't know what was good and what was bad. This post is meant to give you guys an idea of what drugstore products are worth checking out. I feel like when it comes to makeup for school, we're all looking for something natural, long lasting, and most importantly, budget friendly. I've put together a list of products that I think fit into these three categories perfectly. Let's get started.


For foundation, we have a few options. I personally love Revlon when it comes to face products. Revlon Nearly Naked Foundation is a great option for those who are looking for something light and natural. It doesn't do a whole lot for covering major blemishes, but it just perfects the skin and evens out the complexion with a good medium(ish) coverage. This would be great for ladies with dry to normal skin. However, I am oily and I like it a lot. I set it with a powder (I'll get to that in a minute) and it lasts pretty well. It retails for about $8-$10 at your local drugstore.


Revlon Colorstay Whipped Foundation is another really great choice. This is more appropriate for people with oily skin or people who need a bit more coverage. Though it offers a medium-full coverage, it doesn't make you look overly made up or cakey. It seriously stays put on the skin, so it will hold up during those long school hours. It retails for around $10.


For concealer, I personally like the Maybelline 24 Hour SuperStay Concealer. It has a really convenient doe foot applicator. It stays well and blends easily. This retails for around $7.


To set everything, I like the Rimmel Stay Matte Powder. It comes in multiple colors as well as a translucent shade. It keeps me matte and is good for blotting. It retails for $4-$5.


For eyes, I think it's best to start with a good, long lasting base. The Maybelline Color Tattoo in Inked in Pink is a really pretty, every day kind of shade that holds up well on the eyes. It is priced at $6-$7.


Over top of that, I suggest using the Wet N' Wild eye shadow trio in Walking on Eggshells. This trio is perfect for every day. It's a nice selection of colors that makes you look like you put effort into looking nice without going overboard. Plus, the shadows are ultra soft and pigmented. The trio is about $3 and the shades are labeled with where to place each color on your eye. Can it get any better?


For liner, I suggest going with brown. Your eyes will look defined, but not overly dramatic. Take something like the Rimmel Scandal Eyes Waterproof Kohl Eyeliner in Brown and smudge it out at the lash line. For extra staying power, top it with a brown shadow. The liner runs for around $5.


For mascara, I say go with CoverGirl Lash Blast Volume Mascara. I never have any issues with this smudging, and I think it makes my lashes look really long and pretty. It runs for about $6-$7.


For the cheeks, it's nice to have something that can act as your blush and highlighter in one. Milani Baked Blushes do a good job of providing a little bit of a highlight. The shade Luminoso is really pretty and not over the top at all. I think it would go well with the neutral look we're going for here. The blushes are priced at $6-$7.


For lips, I suggest something neutral. L'oreal Color Riche Lipstick in Fairest Nude is a really nice shade. If you want something slightly more pink, Revlon Super Lustrous Lipstick in Primrose is also nice. The L'oreal one is priced pretty high at $8. Revlon is about $5.

L'Oreal Color Riche Lipstick in Fairest Nude


Revlon Super Lustrous Lipstick in Primrose


And there we have it! These are products from the drugstore that I love. I think they would be great choices for a back to school look that is neutral, flattering, age appropriate, and long lasting. Hope this was helpful!

Much love!

Gianna

Saturday, August 3, 2013

Pink Smokey Eye: 21st Birthday Makeup

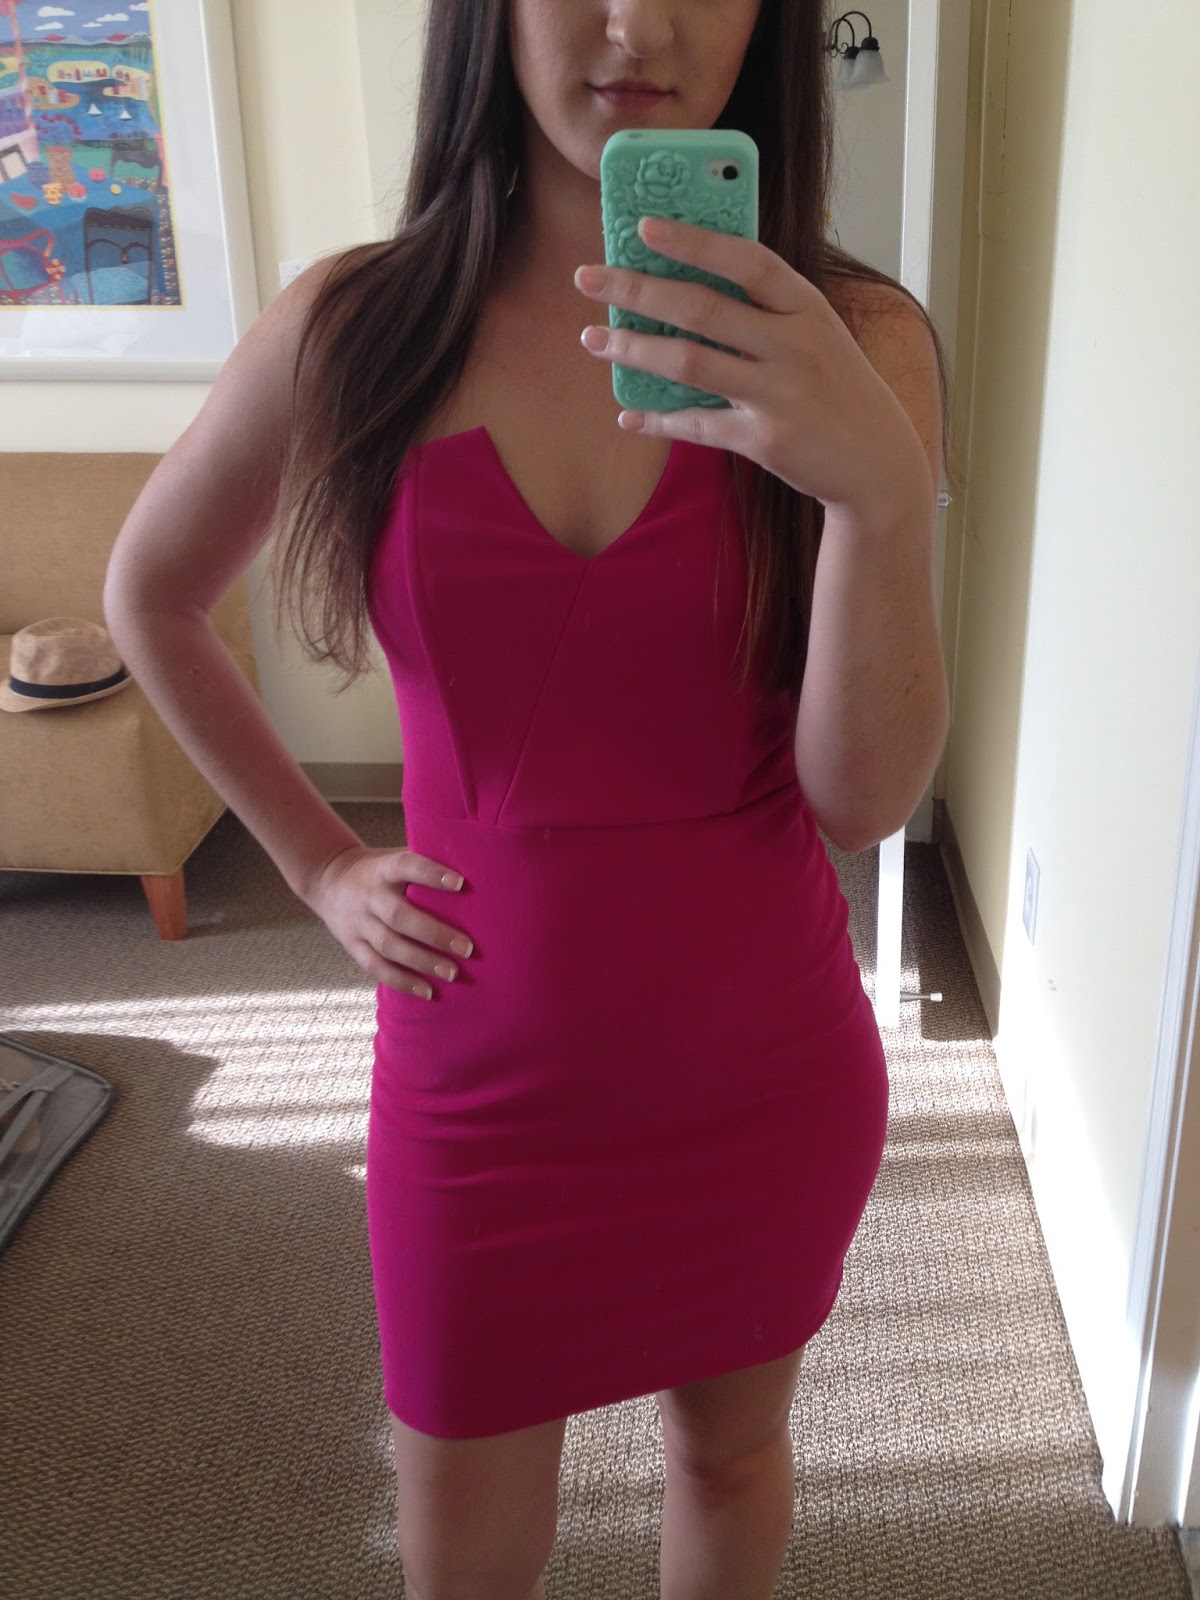
Hey everybody! As I've mentioned in a few of my previous posts, I just got home from celebrating my 21st in Vegas. Of course, my makeup needed to be totally on point when I was out clubbing. I chose a really cute strapless fuschia/pink dress for my night out.


Sorry about the phone pic. I couldn't be bothered with whipping out the camera. Anyway, I wanted an eye look to match this freakin' banging dress. I could have gone with a black smokey eye, but I had my heart set on something more pink. After everything was said and done, I ended up with this:


Here is what I used to achieve this look!

Products: Ardell Edgy Lashes number 402, NYX Single Eyeshadow in Rust. Maybelline Color Tattoo in Pomegranate Punk, Covergirl Lash Blast Volume, Revlon Precision Lash Glue, Sonia Kashuk Eye on Neutrals Palette, Urban Decay 24/7 Eyeliner in Zero, Naked Palette, Urban Decay Eyeshadow Primer Potion, Maybelline Line Stiletto Liquid Eyeliner

Step one: Base.
As always, I primed my eyelids with Urban Decay Primer Potion. This stuff makes it so my eyeshadow stays creaseless and right where I put it on my eye until I take it off. On top of that, I put the Maybelline Color Tattoo in Pomegranate Punk all over my lid so that my shadow would really pop on top of it. Using a base like this also helps with staying power.

Step two: Shadow.
I used NYX eyeshadow in the shade Rust. It's just a really pretty crandberry/fuschia/pinkish/red color that is gorgeous. It's comparable to MAC Cranberry. I put this all over my lid. In the crease, I used a matte brown shade from the Sonia Kashuk Eye on Neutral Palette. I believe I used the third shade over in the second row. This acted as a nice trasition shade so that everything blended seamlessly. To darken the outer corner, I used the shade Dark Horse in the Naked Palette. I also placed a matte black shade in the very outer corner to make the look even more dramatic. As a highlight, I used the color Virgin from the Naked Palette in the inner corner and on the brow bone. I used Rust on the lower lashline, and the matte black on the outer part of the lower lashline.

Step three: Liner.
I used the Urban Decay Pencil in Zero to line my upper lash line and upper and lower water lines. I smudged it out on the top lid. I also used a matte black to set the pencil so that it wouldn't budge. I used Maybelline Line Stiletto Liquid Eyeliner to draw a really thin line on my upper lid. I wanted a thin line up there to camouflage the band from my falsies.

Step four: Lashes.
I curled my lashes and applied Covergirl Lash Blast Mascara to the top and bottom lashes. I really layered it on the bottom because I wanted my lashes to be really dramatic. Once my mascara was done, I popped on some Ardell Edgy lashes number 402. As you can see, they are very spikey and they flare out at the corner. I was going for something edgy and dramatic. I think these lashes were perfect.

This was my final look:


Hope this was informational or of help to you guys!


Much love!!

Gianna

Tuesday, July 30, 2013

What's in my travel makeup bag? Las Vegas Edition!

Hey everybody! By the time you see this I'll probably be home from Vegas. But that's alright. All you need to know is I'm packing up my stuff and heading to celebrate my 21st birthday with my friend. I'm bringing probably an excessive amount of makeup, but honestly, I don't care. Isn't Vegas all about excess?

Seriously though, it's my 21st birthday celebration and I want to be lookin' good. I probably won't use everything that I'm bringing, but I think that's generally the case when it comes to traveling. I want to make sure I have everything I might need.

Let's get started.

First up is eye products.


I've got four pairs of falsies, three are Ardell and one is from one of my Ipsy bags. The brand is J.Cat. I'm not a huge falsies wearer, but I'm going to do it!
I also have two mascaras, Lash Blast Volume and Maybelline the Rocket in waterproof. I want some waterproof mascara for trips to the pool, or to help hold a curl. I love Lash Blast- it's my every day mascara. I often layer these two when I want something really dramatic.
I have two Maybelline Color Tattoos, one in Inked in Pink and one in Pomegranate Punk. I brought the NYX single shadow in Rust to go over Pomegranate Punk for a dramatic eye.
I brought some glitter by Wet N' Wild, because, why the heck not?
I also have my Maybelline Line Stiletto Liquid liner, because, well, duh.
I brought my eyelash curler for obvious reasons.
And for the rest, I have my Urban Decay Primer Potion (can't go a day without this stuff), both of my Naked palettes, and my Sonia Kashuk Eye on Netrals Palette.
I think I'm covered.

On to face products.


I've got three foundations, two are my Shiseido Sun Protection Liquid Foundations in the colors SP30 and SP40. I've been mixing the two. I also brought my Revlon Colorstay Whipped foundation in 200 Sand Beige. I brought this in case the darker shade of my Shiseido runs out and I need a darker foundation. I'm down to the last bit of my Shiseido, so I'd rather be safe than sorry.
I have Rimmel Stay Matte Powder and my MAC MSFN in Medium. I'm dark enough to wear the MSF now, so I'm bringing it. I also want some mattifying powder for when I go out at night.
I brought my Mary-Loumanizer highlight by The Balm, because I love it. I also have a deluxe sample of Too Faced Chocolate Soileil Bronzer and two Milani Blushes in Rose D' Oro and Luminoso.
I brought a few concealers. My NARS Radiant Creamy Concealer and my Maybelline Dream Lumi Touch concealer for the under eyes. Also my MUFE Full Cover Concealer and my Maybelline Super Stay 24 Hour Concealer, in case I need something a touch darker.
I've got my Urban Decay All Nighter Setting Spray, because this stuff works.
And I've got a shimmer mist body spray from Bath and Body Works. This isn't for my face, but I didn't know where else to put it.

Last but not least, lips.


I've got three Revlon lipsticks, a L'Oreal one and a Milani one. I think the Revlon ones are Wink for Pink, Primrose, and Blushing Mauve. The L'Oreal one is Fairest Nude. Milani is Nude Creme. The last two are my favorite nudes.
Two NYX glosses and an Avon one. Sorry- not sure what they are called.
I also have my Physicians Formula Gloss Stain (I did a whole review on this stuff) in the color Hot Pink.

And that's it!

It's a lot, I know. But it's alright. You only turn 21 once!

Much love!

Gianna

Sunday, July 28, 2013

Sonia Kashuk Eye on Neutrals Palette Review (Alternative to Urban Decay Naked Basics Palette!)

Hey everybody! The latest hype concerning Urban Decay is centered around the new Naked Basics Palette. It's priced at 27 bucks for a palette with six neutral, and in my humblest opinion, unexciting shades. They are all matte with the exception of one shade, which is the lightest of the bunch. I've heard mixed reviews on this palette. Some say they love it and use it every day, some say it's nothing special. I personally I am not a huge fan of matte shades. Although I think they are beautiful on others, I have trouble working with them. I think it takes a lot of precision to have an all-matte-eye look good. But matte shades certainly come in handy when you're doing something neutral, or you want a matte shade to pop in the crease so your eye isn't resembling a disco ball.

Here is what the UD Naked Basics palette looks like, if you haven't seen it. I don't own it personally, so I do not have my own photo of it.


I mean, I kind of get it. It's small and convenient to have all those matte shades in one place. But I am the proud owner of a drugstore option that I think is very comparable to the Naked Basics Palette. Perhaps not in the exact shades, but in the concept.

The Sonia Kashuk Eye on Neutrals Palette (I think they recently renamed it the Eye Couture Palette) is sold at Target and the Sonia Kashuk website for $19.99. Okay, yes, it's only $7 cheaper. But you get 12 shades. That's right people, double the amount of shades. And not only do you get twice as many shades, they are super soft, highly pigmented (all except one), and easy to use. It comes in a really nice palette that's sturdy and travel friendly. Check it out:


Sorry my palette is such a dirty mess, you guys. It's well loved. I tried to clean it up but it wasn't working out.

Anyways, as you can see, the palette has twelve neutral, all-matte shades. I have used this palette for neutral eye looks and all-matte dramatic looks. It also has a little pull out thing on the side, which reveals three eye looks with specific instructions. It has a "softly contoured eye," a "wash of neutral," and a "smokey eye."


This is a nice touch, I think. Good for beginners or if you just want something easy.

I have swatches for the whole palette. The swatches go from left to right, top to bottom.


Look at that black, you guys!

The only color I think is a dud is the second one. It just lacks that same level of pigmentation that the rest of the shades have. Other than that one shade, this palette is wonderful. Highly pigmented shades, an excellent selection of browns, peaches, matte highlight colors, and a freakin' fab black shade. They are also super soft. The only thing I think it needs its a matte plum shade. But hey, the Naked Basics palette doesn't have that either.

My advice: go with the Sonia Kashuk palette. You get more shades for cheaper. Remember that you can mix the shades to get an even better selection of colors.

That's all I've got for today, everybody.

Much much love as always!

Gianna